TL;DR you can already access the finished project on GitHub
Mobile app: https://github.com/ademcan/react-native-stripe
Back-end: https://github.com/ademcan/stripe-backend
This tutorial is also available as a video format on YouTube.
I was planning this blogpost since quite some time, and I thought now was the perfect time as some people were asking about it on Twitter. Stripe is a great platform to accept payments for your project. However, there is not official React Native library (they released a React library recently tho). Some people mentioned using Tipsi (https://github.com/tipsi/tipsi-stripe) but it hasn’t been updated for a while and is not an official library. Today, we are going to create a UI in React Native and use the official Stripe iOS SDK to accept payments in our mobile app. We will have to deal with some JavaScript and a tiny bit of Objective-C (no worries, just a tiny bit). Let’s get started!
The fist thing to do (if you haven’t already) is to have a Stripe account and create a new project. Then, go to the Developer > API keys settings and save your private and secret key somewhere, we are going to use them later. For our payment system to work we also need a back-end and we will use ExpressJS to implement a simple REST API. Without further ado, let’s do it 👍
1. Create a new React Native project
Skip this step if you already have a RN project. I will create a new one especially for this tutorial, so that we can also refer to it with its name. Open your command line tool and run:
npx react-native init StripeRN
cd StripeRN
2. Install Stripe iOS SDK
The Stripe iOS SDK is distributed via cocoapods, to install it open the ios/Podfile file and add the following line in the list of Pods:
pod 'Stripe'
Close the file and run the following commands on your command line:
cd ios
pod install
We now installed Stripe in our RN project 👌
3. Configure Stripe SDK
To configure the Stripe SDK we need to instantiate it via the AppDelegate.m file, to do so open the Xcode project ios/StripeRN.xcworkspace
and add the following line to your AppDelegate.m file:
1 – at the top of the file
#import <Stripe/Stripe.h>
2 – and the following lines just before the return YES; statement
self.rootViewController = rootViewController;
[Stripe setDefaultPublishableKey:@"pk_test_XXXXXXXXXX"]; // use your own pk_test Stripe key here
3 – don’t forget to update the pk_test key to your own.
Your AppDelegate.m file should look like below:
In addition add the following line to AppDelegate.h just before the @end statement
@property (nonatomic, strong) UIViewController *rootViewController;
Your AppDelegate.h should look like below:
If you are wondering why we need to declare the rootView UIViewController it’s to support the 3D Secure system. To read more about the 3D Secure system you can check the official Stripe documentation about authentication using 3D Secure.
4. Create an empty UIViewController for 3D Secure
To accept cards with the 3D Secure system we need to create a new UIViewController to take control of the validation flow. To do so create a new CheckoutViewController.m and CheckoutViewController.h files in XCode and add the following code:
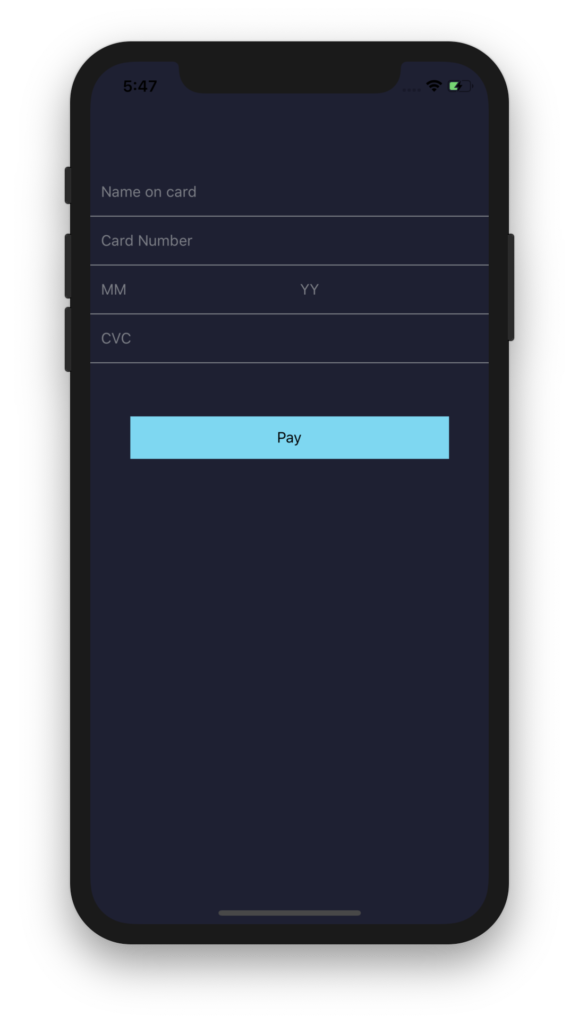
5. Create the payment UI in React Native
We are going to create a simple UI to grab all the required information to process card payment. Open your App.js file and copy paste the following code to it:
5. Create Native Module to access the Stripe SDK from our React Native code
To be able to access the Stripe SDK from React Native we need to create a Native Module. To do so create a new StripeBridge.m and StripeBridge.h files in XCode and update their content to:
We created our StripeBridge Native Module and can access it via React Native by pressing the Pay button. The Native Module only contains one single function to accept payment. You can check the Stripe iOS SDK documentation for more parameters and customization. The idea is to pass the information we collected from the user in our React Native UI (JavaScript) to the iOS SDK via a bridge. The StripeBridge can then process the information received to finalize a payment (or call the 3D secure view if needed). Some simple conversions are required for the month and year (L12 and L13) values as they are passed as NSString and need to be converted to NSNumber.
6. Create a nodeJS back-end to take care of PaymentIntents
To be able to succesfully charge a customer you need to create a back-end solution to generate a PaymentIntent. Stripe requires a PaymentIntent in addition to the credit card information to validate a payment. For that purpose we will create a simple ExpressJS back-end following one of my previous blogpost: Creating a simple back-end with ExpressJS
Once done, we need to install the stripe package, run
yarn add stripe
We then need to update the index.js file and add an endpoint to return a PaymentIntent to our mobile app. Update your index.js as follow:
Don’t forget to update the stripe_sk on L24 to your own secret key and the amount you want to collect on L30. Every time the mobile app will connect to the /createStripePaymentIntent endpoint a new PaymentIntent will be returned. The PaymentIntent in addition to the credit card information will be used by the iOS SDK to confirm a payment.
6. Run the app
To test our code we need to run the app, open your terminal and run
react-native start
On Xcode, choose your simulator and press Run. You should see your app running 😍
Well done! You can now try the integration with a list of test cards provided by Stripe and see how the app reacts to different scenarios
Don’t hesitate to share if you enjoyed this tutorial 😎
We can work together

Do you have a guide for also doing this on Android?
Thanks!
There were so many people asking for the Android version but I just didn’t have time to get to it…
is it android version supporting now
You saved my day ! <3